
The WP Rocket plugin is so much more than just a caching tool for your website. You’ll see what I mean when you dive into its settings and discover everything it can do for you – like boosting your site’s loading speed.
As you probably know, page load speed is a big deal when it comes to website management, since it directly impacts the user experience.
If your site takes forever to load, there’s a good chance users will get impatient and bounce off to find what they’re looking for elsewhere.
On the flip side, a nimble website encourages visitors to stick around longer, increasing their dwell time and, in turn, boosting your standing in Google’s eyes.

This translates, as you might already know, to better rankings.
WP Rocket is regarded by many as the best cache plugin for WordPress available right now.
You’ll see a significant uptick in your website’s performance the moment you activate it, and even more so after a few tweaks in its settings.
So, keep reading and pay close attention to the tips I’m about to share if you want to get the most out of it.
What is WP Rocket and how does it work?
WP Rocket is a comprehensive plugin designed to boost your website’s performance. It’ll assist you in managing your cache and enhancing your site’s load speed, ensuring users enjoy a top-notch browsing experience.
| What is caching in WordPress? |
| Caching is a storage area where copies of a website’s final files are stored, which will be served as responses to user requests. In other words, when someone visits a page, WordPress needs to make multiple requests to the database to construct its final content. |
Thanks to caching, the number of these requests is cut down. This is because previously generated page copies are stored and it’s these copies that are served to users, resulting in much faster response times.
But WP Rocket isn’t just about enabling cache for your WordPress.
WP Rocket goes above and beyond to optimize your website’s overall performance.
And we’re going to delve into it in this post. Ready to join me?
Price of the WP Rocket Plugin for WordPress
The first and most important thing you should know that WP Rocket is a premium plugin for WordPress and, as such, it is a paid add-on.
There are 3 pricing plans available, depending on your specific needs.
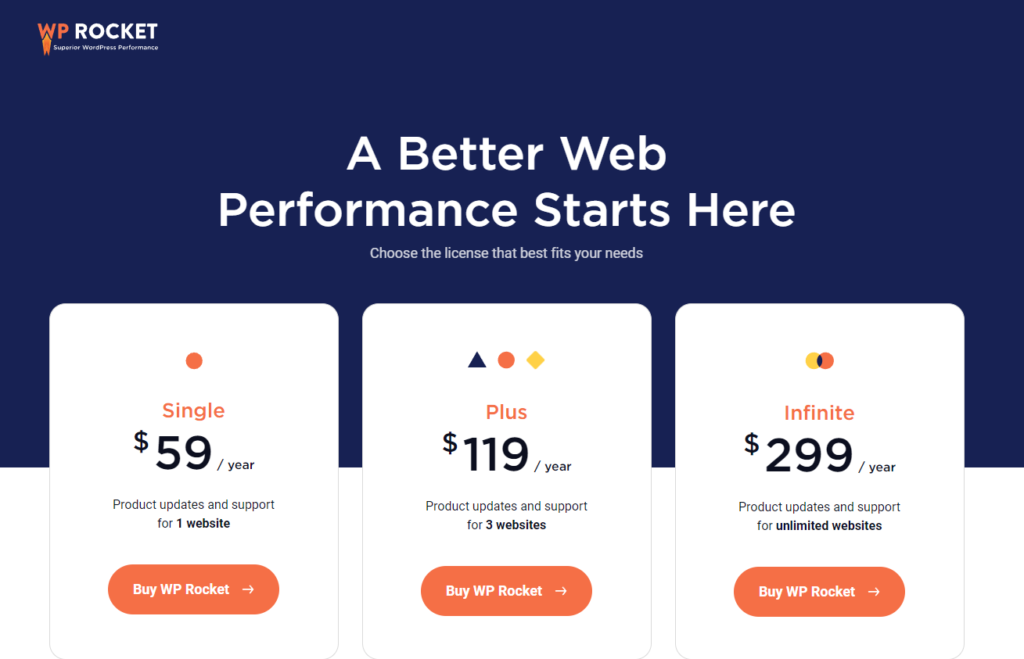
The basic plan costs €59 per year and allows you to activate it on only 1 WordPress installation.
If you want to use the plugin on unlimited websites, you’ll need to get the Infinite license, which costs €299 per year.
Is WP Rocket available for free download?
I hate to break it to you, but as of now, there’s no free version of WP Rocket.
What you do have is a 14-day trial period.
So, if you purchase a license and it doesn’t meet your expectations, you can easily request a refund without any fuss.
It’s a recommended route if you’re looking to test out this plugin before fully committing to a purchase.
Practical WP Rocket Tutorial
If tech jargon isn’t your thing, hearing about cache plugins or WPO improvements might give you a slight shudder.
But, fear not, WP Rocket is far from intimidating to handle.
To make things even smoother for you, I’ll walk you through how to set it up to unleash its full potential.
You’ll see, you don’t need to be an expert. With just a few tweaks, your website will start soaring like a rocket.
How to Install WP Rocket
The first step, naturally, is to download and install the plugin.
As we’ve mentioned, WP Rocket is a premium plugin, so you’ll need to head over to their website and purchase the plan that best suits your needs.
Once you’ve secured your license, you can download the .zip file from your user account, which will allow you to install WP Rocket on your site.
Installing it in WordPress is no different than any other premium plugin. Just navigate to the “Plugins > Add New” section and, from there, click the “Upload Plugin” button at the top.
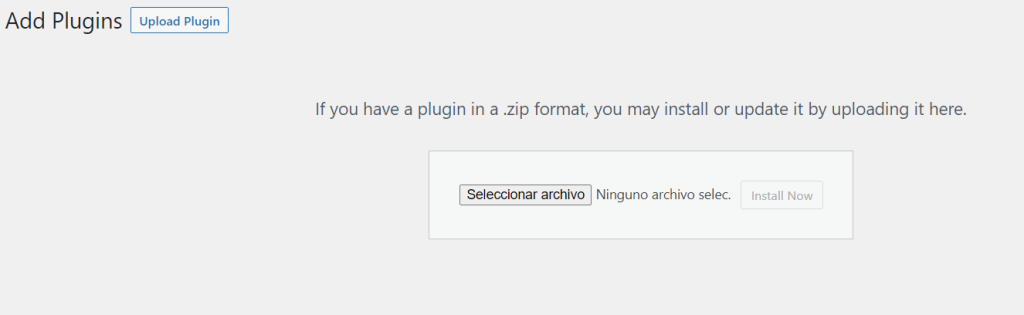
We’ll see a screen where we can select the .zip file we had downloaded and install it in our WordPress.
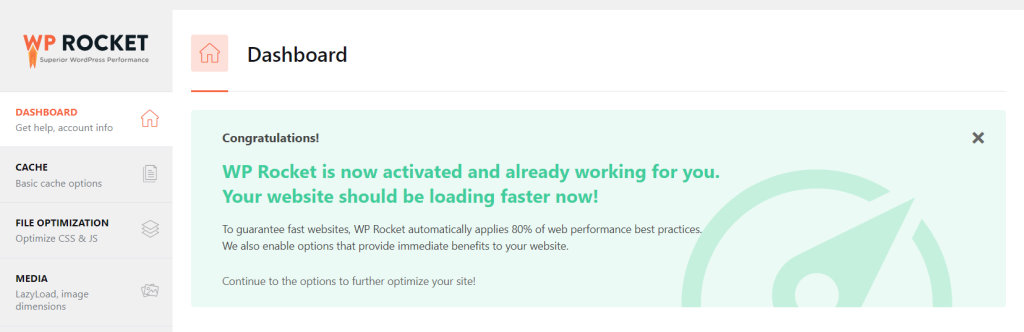
Once the installation is complete, all that’s left is to click the “Activate plugin” button.
From that moment, WP Rocket will start enhancing the performance of our website.
Step-by-Step WP Rocket Configuration
I’ve noticed that many users, when using WP Rocket, simply activate it and let the plugin do its thing.
It is true that with the default configuration a good optimization is achieved.
What are the automatic functions that WP Rocket performs upon activation?
- Page, browser, and WooCommerce cart caching management
- GZIP compression
- Cross-origin support for web fonts
- Support and detection of plugins, themes, and hosting environments
- Optimization of loading Google fonts
- Disabling WordPress’ automatic conversion of characters to emojis
Now, even though the enhancements are significant, I have to emphasize that without making some tweaks, you’d be missing out on many opportunities to optimize your website.
Next, I’ll outline which features you can adjust with WP Rocket and share the settings I typically apply to most of my sites.
Cache Activation and Clearing
WP Rocket enables its caching functionality as soon as you activate the plugin.
From that moment on, your pages will start being cached, and as a result, your users will experience much faster loading times.
If, at any point, you want to refresh the cached content, you can do so from the main settings tab of the plugin or from the top menu of your WordPress installation.
And what if we don’t want to use WP Rocket’s cache?
WP Rocket doesn’t provide an option to disable the cache directly.
Therefore, if you want to deactivate WP Rocket’s cache but still want to use some of its other optimization features, you’ll need to download the following plugin from their website.
In addition, WP Rocket allows you to adjust some cache-related parameters. Let’s take a look at them.
Firstly, we have the option to enable cache for mobile devices.
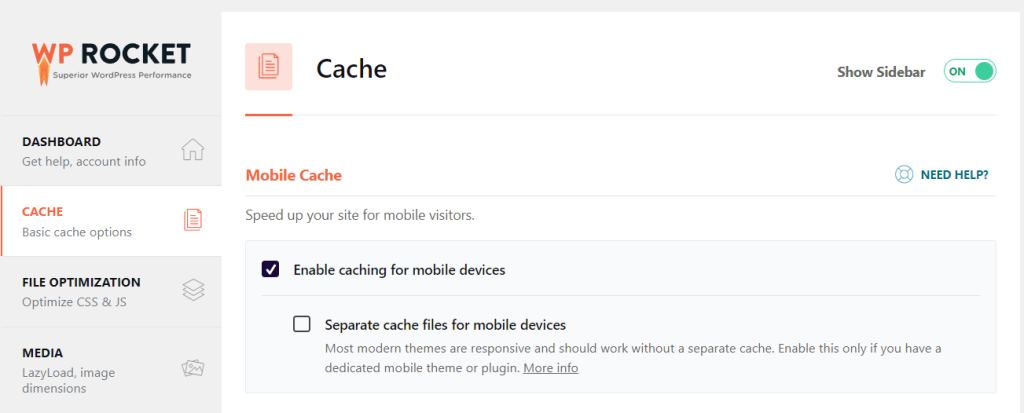
If you have a responsive website, meaning the sizes and positions of your page elements adjust to the device’s dimensions, you’ll want to check this option.
Nowadays, nearly all websites, especially those built with WordPress, are responsive. So, this box should typically be checked.
On the other hand, there’s an option right below it labeled “Store files separately for mobile devices.” This setting isn’t about being responsive, but rather about entirely different operations based on the device.
If you have a plugin or specific development causing distinct behaviors depending on whether the site is loaded on a desktop or mobile, you’ll need to check this option.
Additionally, WP Rocket also allows you to enable cache for logged-in users. This feature is handy for membership sites or online stores.
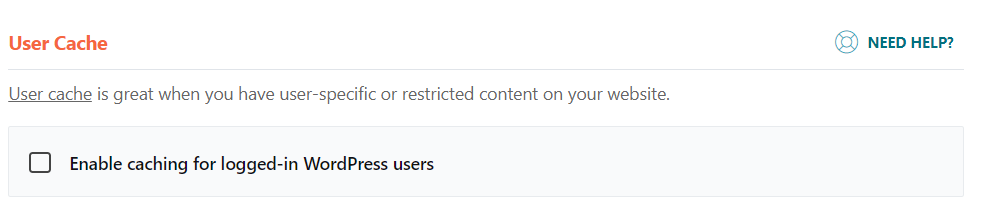
However, whenever you enable this option, you should check its proper functioning and, if necessary, exclude certain URLs that should not be cached because their content changes frequently.
Finally, we can define the cache lifespan, which means how often the data is typically renewed.
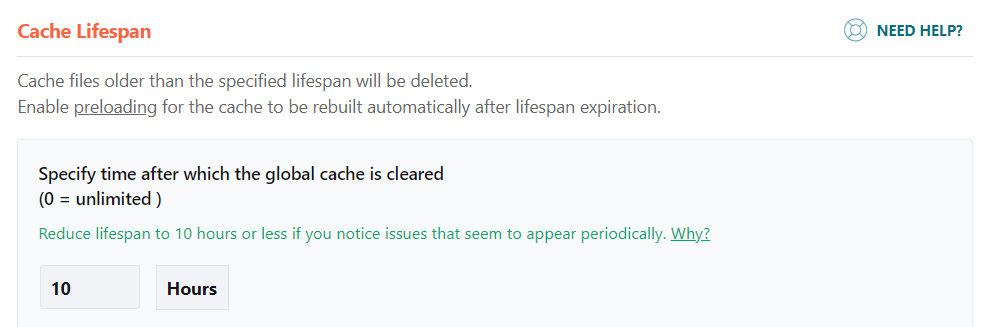
Generally, the default option of 10 hours is quite balanced, and it’s the one I usually keep. However, on pages that don’t undergo frequent changes, you can increase it to 24 hours.
Optimizing CSS and JavaScript Files
One of the aspects that often raises doubts when it comes to improving website speed is everything related to loading CSS and JavaScript files.
And it’s not without reason. If you don’t know what you’re doing, you can end up breaking your website.
| What happens if something goes wrong? |
| The main advice I can give you when working with WP Rocket’s CSS and JavaScript optimizations is to apply one option at a time and immediately check your website. Test each optimization separately. One by one. |
This way, if something doesn’t work, you’ll know what to deactivate to make things function properly again.
And don’t worry about testing.
WP Rocket doesn’t make these modifications directly on your website but uses internal copies to serve your pages, so there’s no risk of breaking anything.
Simply disable the option causing the issue, and your website will return to normal.
In this section, we will explore the meaning of each configuration, which ones you should activate, and how to achieve good results with minimal risk.
CSS File Minification
Let’s start with CSS files, and the first option we encounter is the one that allows us to minimize the file size.

If you have ever seen a CSS file, you may have noticed that, to make it easier to read and understand, the programmer uses spaces and line breaks to separate statements. They might even add comments to explain what each instruction does.
While these actions are useful for programming, they also increase the file size, resulting in extra work for the server when transferring them over the Internet.
With this WP Rocket option, the size of CSS files is reduced by eliminating these aesthetic resources, leading to faster loading times.
It’s an option that I always recommend activating.
Combine CSS Files
The next aspect we can configure is combining CSS files into one. This reduces the number of requests to the server.
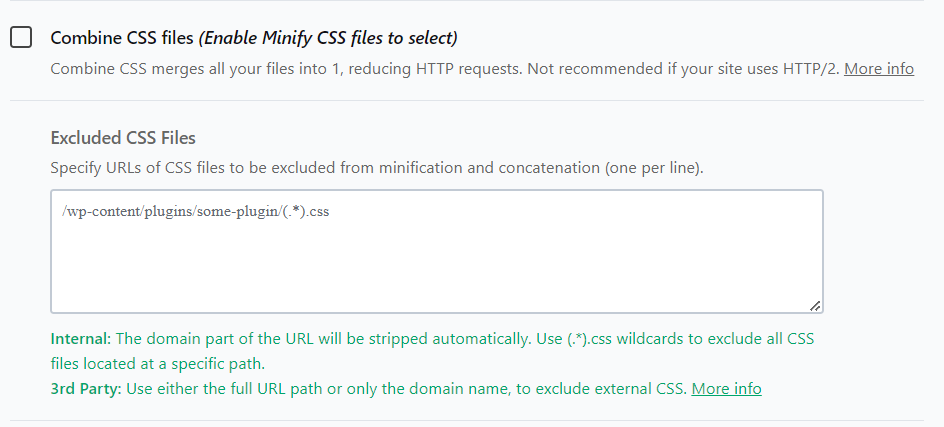
WP Rocket itself does not recommend enabling this option if your site uses HTTP/2, as it does not provide any advantages in that case and may cause more problems than benefits.
Considering that nowadays most hosting services support the HTTP/2 protocol, it is usually unnecessary to activate this option.
If you are unsure whether your website implements the HTTP/2 protocol or not, you can check it here.
Optimizing CSS Delivery
When you request a web page, it needs to load its styles to be displayed correctly. Otherwise, you would see a web page without any appearance or structure, with all elements misaligned.
However, not all styles are necessary for the initial view.
CSS optimization does precisely that: it decides which styles a page should load initially to be displayed correctly, so it doesn’t have to wait for the complete reading of all CSS files before showing it to the user.
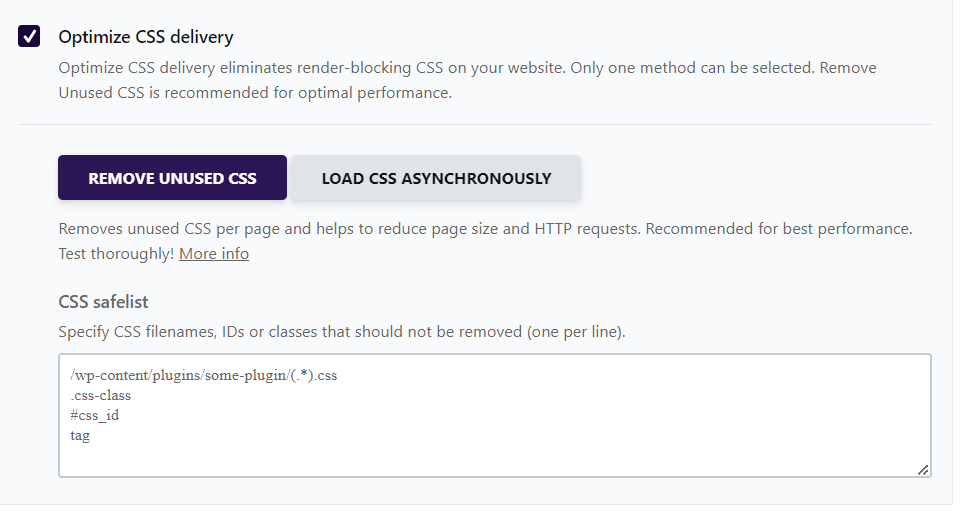
WP Rocket offers you two modes to optimize CSS delivery:
- Remove unused CSS: This is the recommended option and the one I typically use. Additionally, if you notice that a particular style is not loading correctly, you can indicate it in the exclusion box so that WP Rocket always takes it into account.
- Load CSS asynchronously: WP Rocket analyzes the files to generate the critical CSS path (styles that are strictly necessary) and loads them at the beginning of the page. The remaining styles are loaded in the background once the page is displayed to the user.
Minify and Combine JavaScript Files
As we saw with CSS, WP Rocket allows you to minimize JavaScript files to make them smaller and also combines them into a single file.
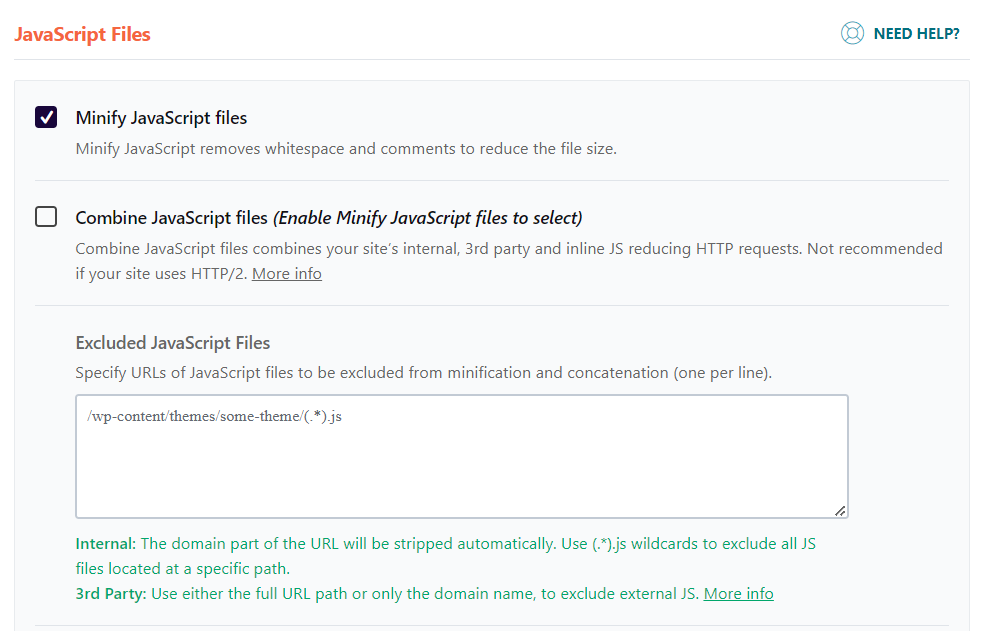
I usually activate the first option but not the second one.
Defer JavaScript Loading
Similar to the asynchronous loading of CSS, WP Rocket allows JavaScript files to load at the end of the page, so they don’t interfere with the initial rendering and the process remains as fast as possible.
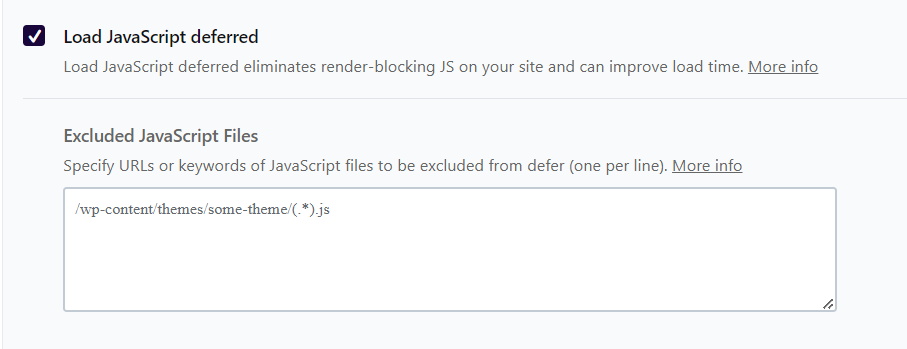
I usually activate it as well, and if any file causes issues, I exclude it using the lower box.
Delay JavaScript Execution
Another feature that WP Rocket provides to improve JavaScript loading is delaying its execution until the user interacts with the web page.
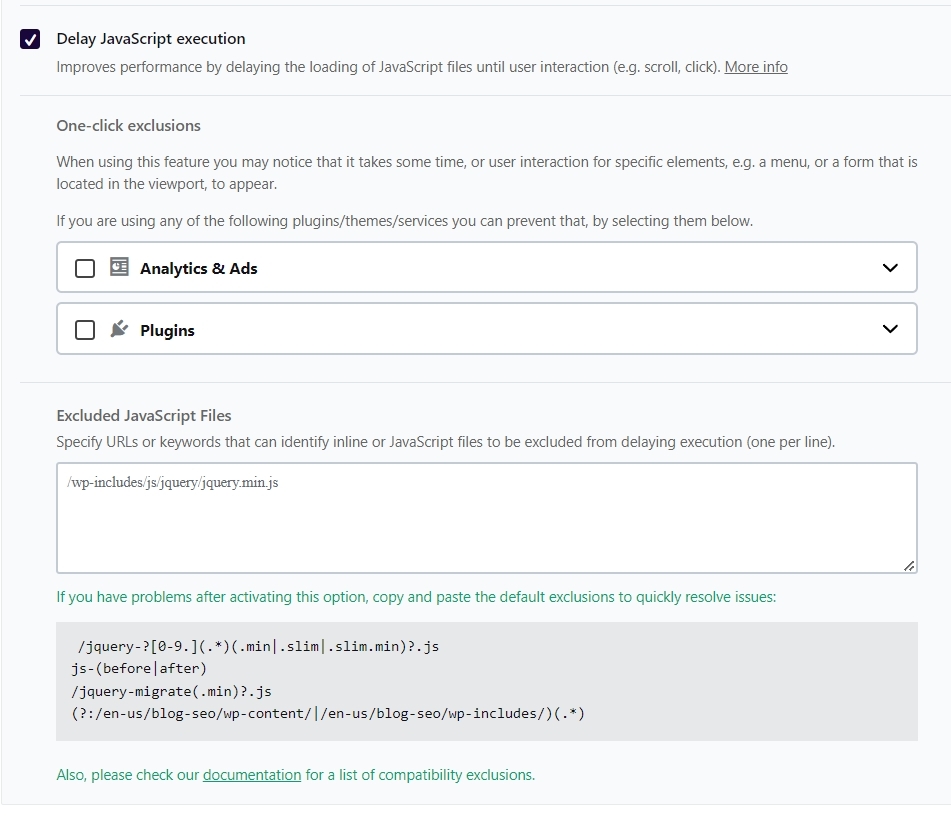
It’s a powerful improvement that I usually activate, but it can also cause certain issues.
That’s why it’s essential to conduct a thorough review of your website to make sure everything works correctly. If any JavaScript function fails, you can exclude it using the designated boxes or simply disable this enhancement.
Improve Media Loading (Lazy Load)
We all know that images and videos, due to their size, are the resources that often have the most significant impact on a website’s speed.
The Lazy Load option allows us to defer the loading of these elements until the user reaches the area of the page where they are located.
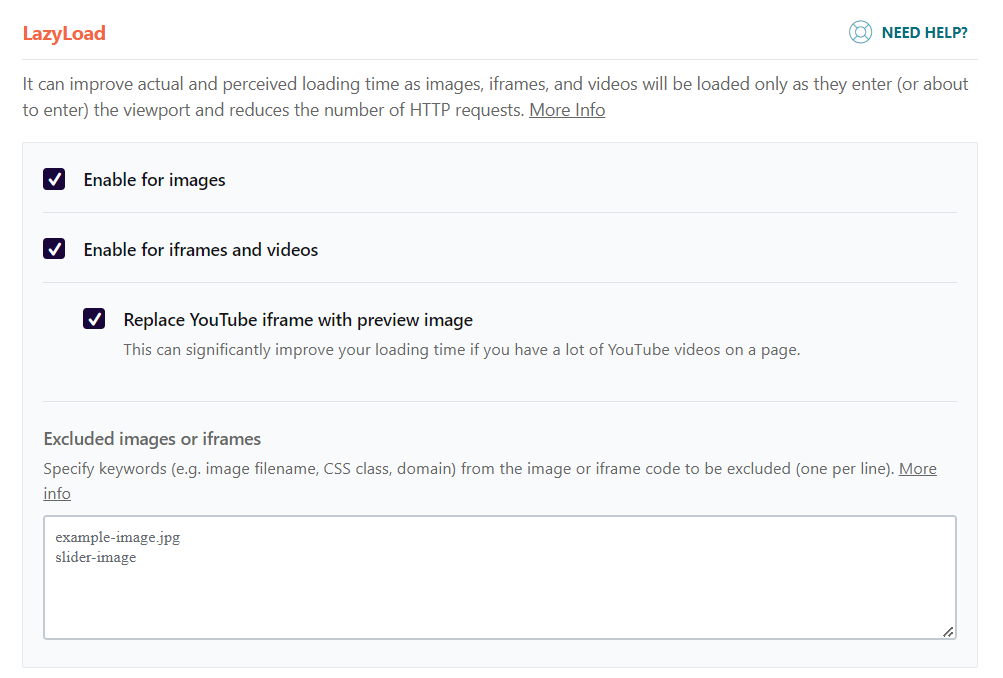
Furthermore, WP Rocket offers an additional functionality for YouTube videos, allowing us to automatically replace the video with a preview image. This way, we use a lighter resource (the image), and the video will only load when the user clicks on it.
Regarding images, WP Rocket also provides an option to enable a feature that completes missing width and height attributes in the HTML.
This improves rendering in the browser, as it knows the space the image will occupy before fully downloading it, avoiding any displacement of elements as we navigate through the page.
In my opinion, all the media-related options are very useful, and I typically activate them on my websites.
Resource Preloading
Traditionally, a cache fills up as users make requests.
So, when a user visits a page and if that page isn’t cached yet, it gets created and stored, speeding up access for the next visitor.
Resource preloading accelerates this process. WP Rocket’s bot automatically crawls your site, stashing away copies of all the pages in the cache.
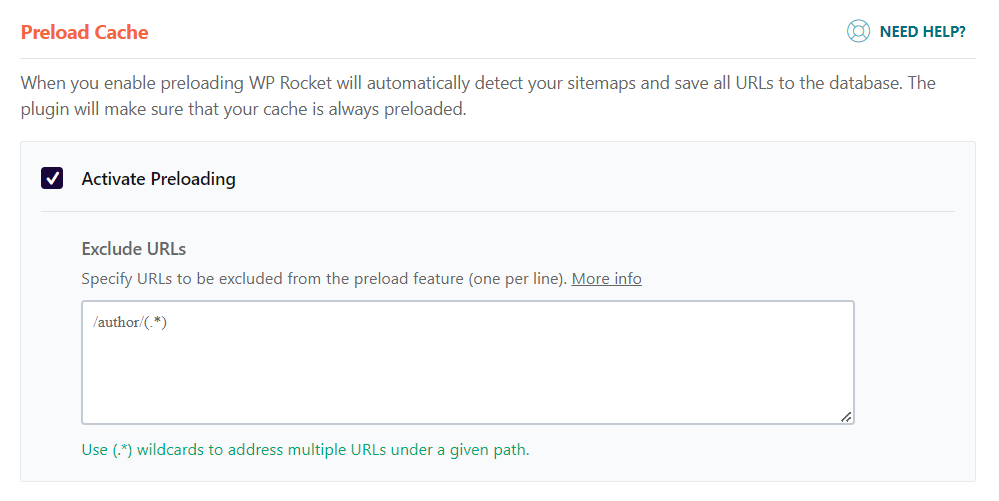
This way, users will always see updated versions of your pages and access them much more quickly.
Therefore, enabling the Preload option is highly recommended.
Furthermore, WP Rocket offers other additional configurations to further improve the loading of your pages.
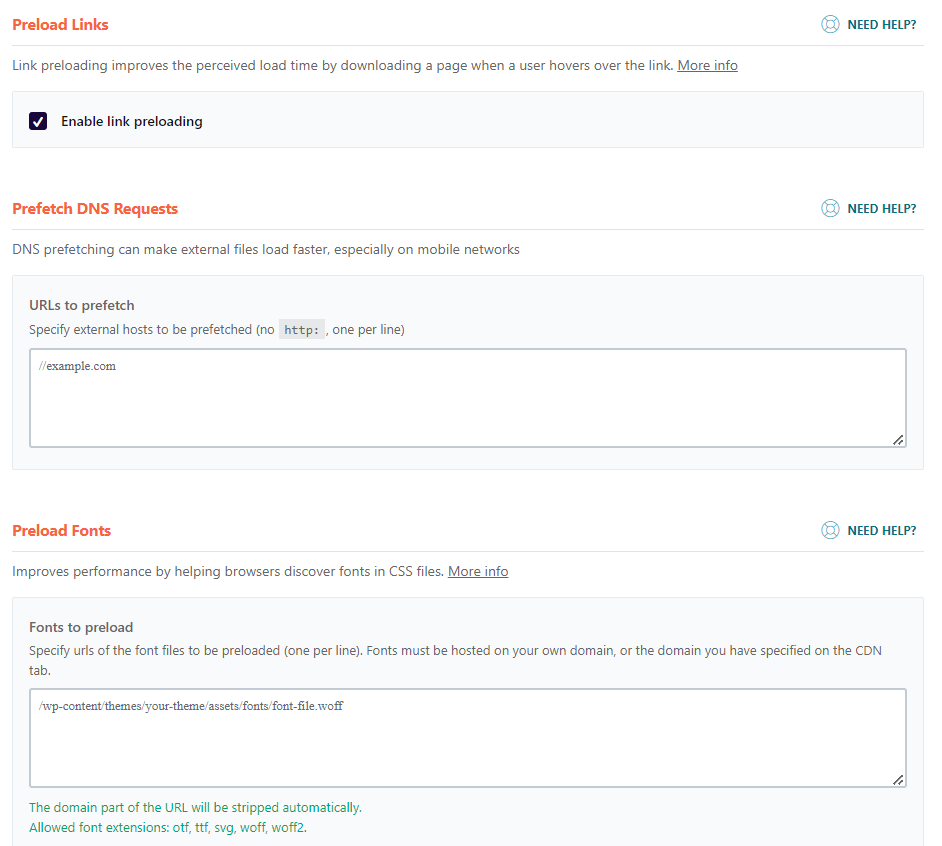
Let me briefly explain what these additional configurations consist of:
- Enable link preloading: This allows the browser to download the content of an internal link in the background when the user hovers over it. This way, if they click on the link, it will open much faster. It’s an option I find very useful to have activated.
- DNS prefetching: If you want to speed up requests to external URLs linked on your website, you can specify the domains you would like to load faster. To be honest, I don’t use this option too often.
- Preload Fonts: Sometimes, Google PageSpeed Insights recommends preloading the fonts of our website to improve performance. Here, you can specify the paths to the font files you want to preload.
Advanced WP Rocket Rules
For most users, there’s typically no need to tweak anything here. But, if you have advanced knowledge and want more control over WP Rocket’s operations, this section can be a game changer.
For instance, you can choose which pages, cookies, or user agents shouldn’t be cached, as well as decide which URLs should always be purged when you make updates.
I can’t provide a one-size-fits-all guide for setting this up since it’s highly specific to each individual site.
However, if diving deep into the technical side doesn’t intimidate you, give these options a once-over. You might just find a fix for certain issues on your site.
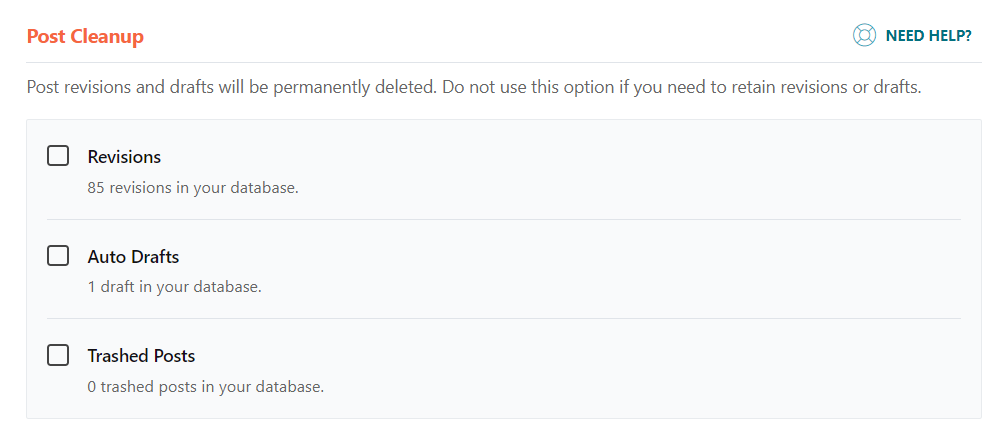
Optimize the Database
The database of your website is not static; it accumulates files generated over time.
Therefore, you’ll need to clean it from time to time to remove unnecessary “junk” it’s just taking up space and slowing down the loading speed. The WP Rocket plugin allows you to clean the database with just a few clicks.
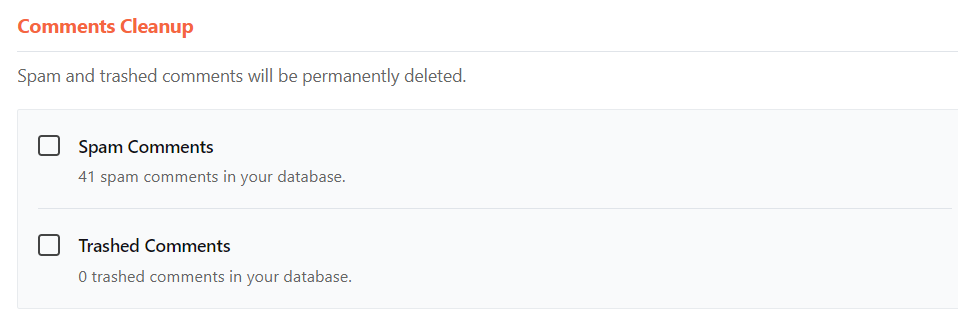
In addition to cleaning up entries, you can also delete comments, where you’ll have the option to remove all the spam that may have entered your page, as well as the discarded comments found in the trash for any reason.
You also have the option to clean up transients, which are temporary information generated by plugins or the theme being used. These transients can create thousands of records that may slow down the database queries.
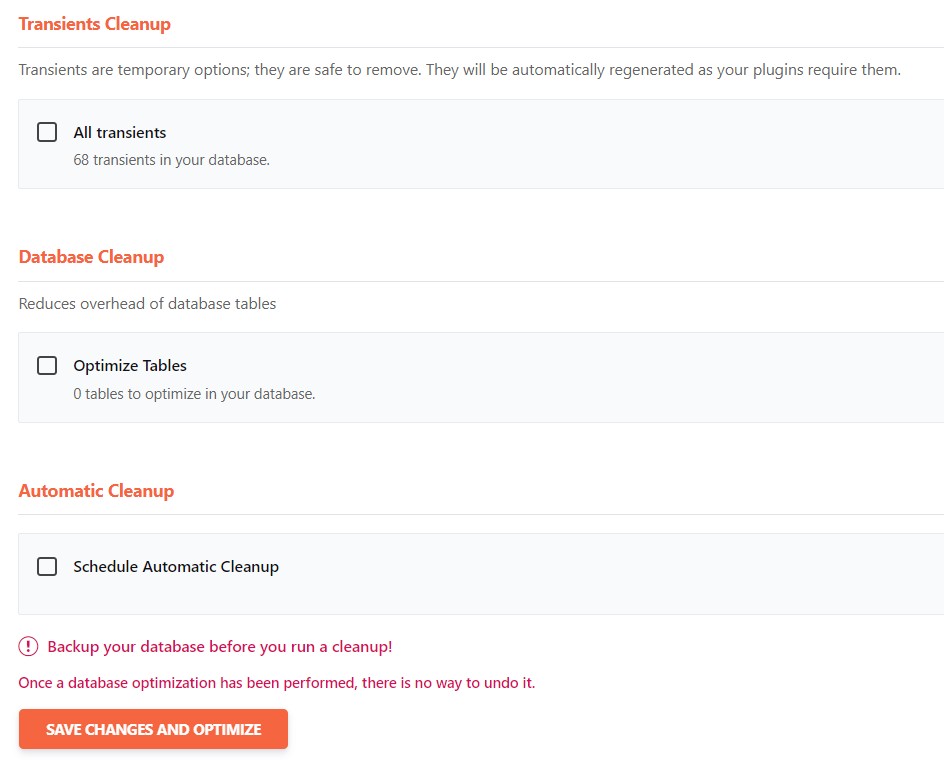
You can perform this cleanup without any problems. Don’t worry about it affecting your website, as if any of these transients are necessary, they will be regenerated.
Finally, you have the option to optimize your database tables or schedule automatic cleanup.
How to Configure a CDN with WP Rocket
WP Rocket can also help you manage your CDN if you’re using services like KeyCDN, StackPath (formerly MaxCDN), or RocketCDN, the premium solution offered by WP Rocket distributors at an additional cost.
| What is a CDN? |
| A CDN is a network of servers that store copies of the static elements of your website, such as images, CSS files, or JavaScript, to load them faster. |
To enable the use of a CDN in WP Rocket, you should first sign up for a CDN service with your preferred provider and then activate the corresponding option in the plugin.
Once done, you’ll need to add the CNAMEs you obtain from the CDN service itself you are using.
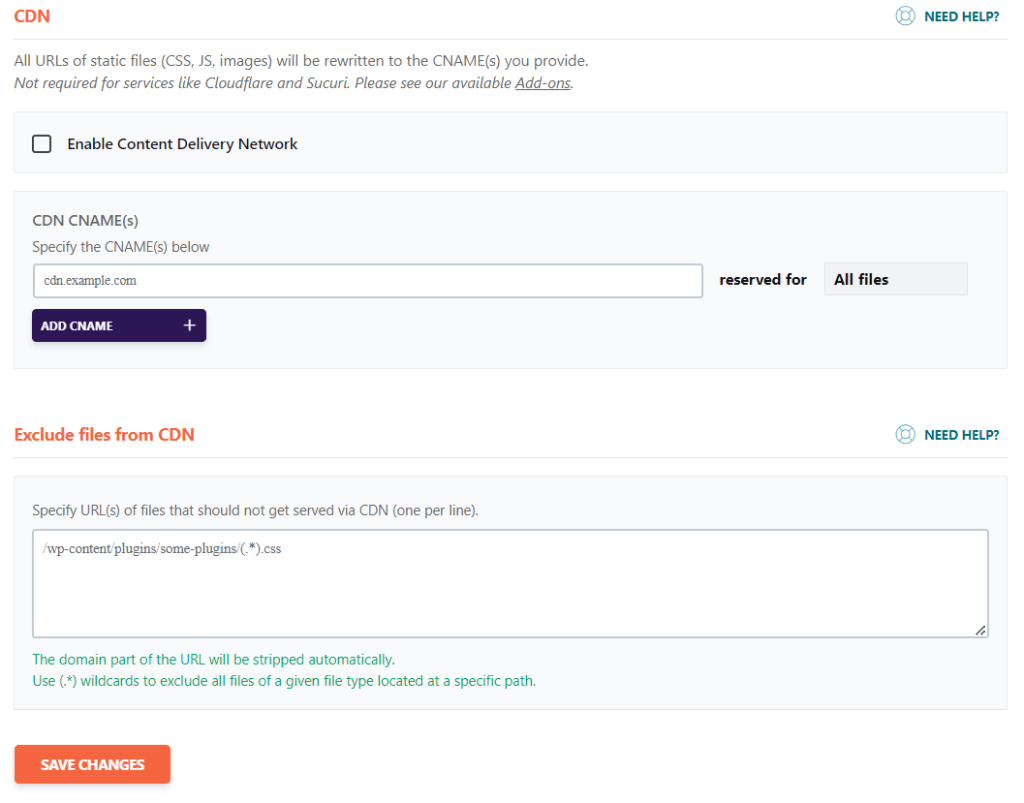
WP Rocket allows you to rewrite URLs and exclude specific files. Additionally, you can use CNAMEs for certain file types, such as images.
However, you may have noticed that when talking about CDNs, I didn’t mention anything about Cloudflare. This is because, if you use Cloudflare, WP Rocket has a separate add-on for managing it, along with the other CDNs, all from the same control panel. Let me explain it to you in more detail:
WP Rocket and Cloudflare
As a user of Cloudflare on several of my websites, I can tell you that the features included in the WP Rocket plugin for managing Cloudflare are quite convenient.
You can find and activate the Cloudflare add-on in the “Add-ons” tab within WP Rocket.
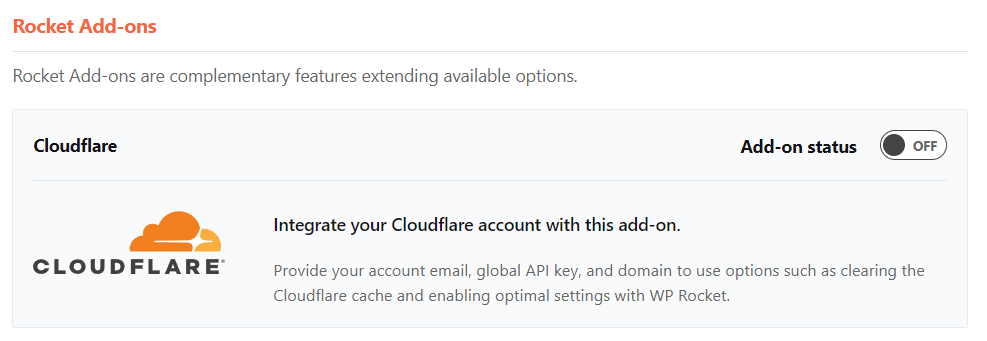
To use it, simply enter the API data, which you can find in the general information section of each of your domains within your Cloudflare account, along with the email address you used to sign up.
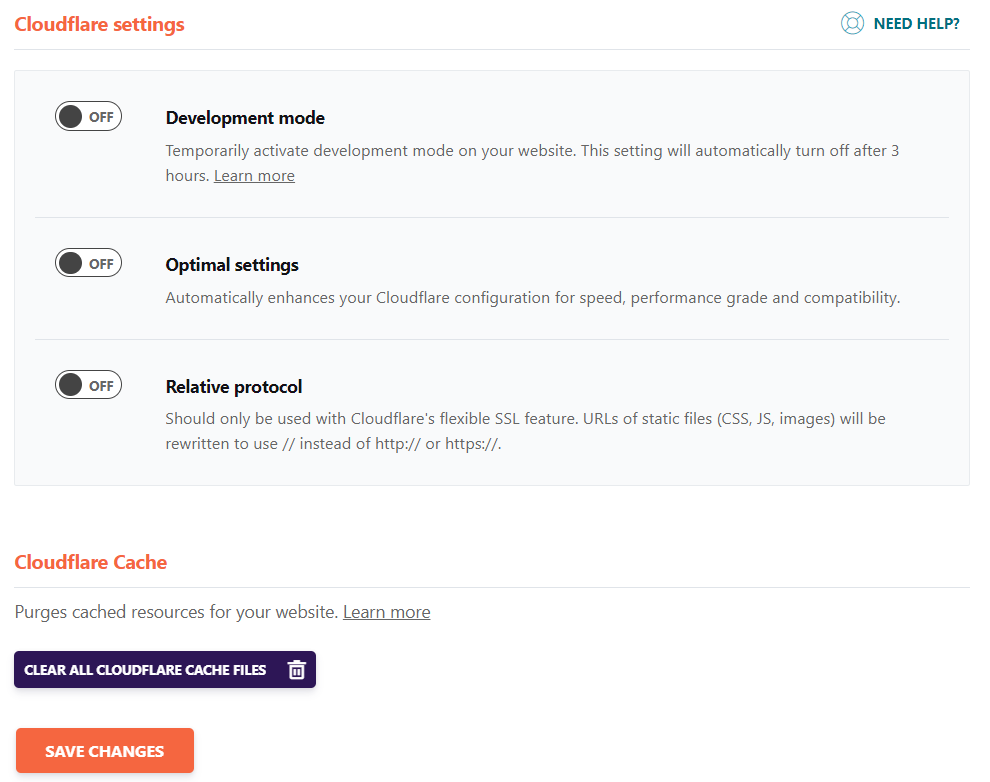
Once you have connected your WP Rocket installation with Cloudflare, you will have access to the following settings:
- Enable Development Mode: This allows you to make changes to your website for several hours without worrying about Cloudflare’s caching.
- Activate Cloudflare Optimal Settings: This option ensures compatibility with WP Rocket based on tests conducted by its developers. If you encounter any errors when installing WP Rocket, this option can provide a solution.
- Use Relative Protocol: Enable this option only if you are using Cloudflare’s Flexible SSL configuration and are fully aware of what you are doing.
One thing that has always been a bit inconvenient for me when using Cloudflare is having to log into my account to clear the cache every time I make a change on my website that is not reflected automatically.
With the WP Rocket plugin for Cloudflare, besides having the option to enable development mode, I can now clear the cache directly from my WordPress with a simple click of a button
Indeed, Cloudflare has many more functionalities than WP Rocket allows you to control, but just with what the plugin offers, I assure you that you’ll save a considerable amount of time.
Heartbeat – The Synchronization Between Server and Browser
The WordPress Heartbeat API synchronizes the browser and the server, enabling real-time data transfer.
It intervenes in various processes of your WordPress, such as admin panel notifications, auto-saving and draft revisions, real-time data, etc.
If you try to reduce some of the tasks performed by Heartbeat, you can lighten the load on your server.
WP Rocket makes this process straightforward as you can simply enable the checkbox labeled “Control Heartbeat.”
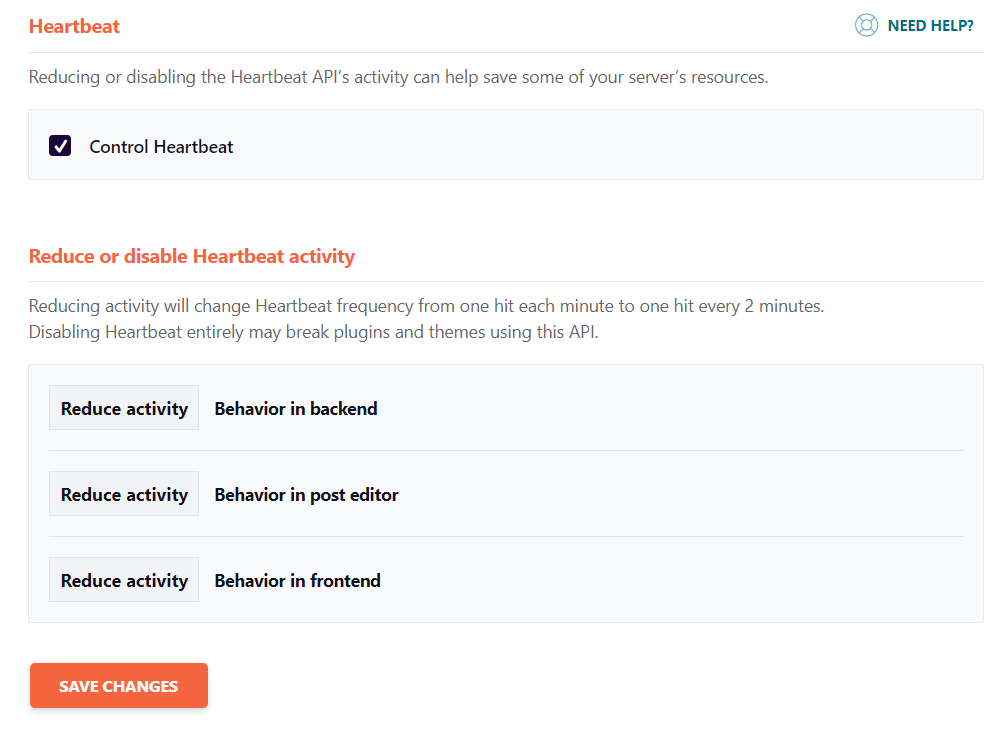
There, you can reduce the activity of Heartbeat, deactivate it completely, or leave it unrestricted.
More Tools and Extensions
I mentioned earlier about the integration of WP Rocket with Cloudflare.
However, that’s not the only extension the plugin offers. In the Add-ons section, you can find other plugins to enhance compatibility with various utilities, such as Varnish, Sucuri, or the WebP image format.
Furthermore, the Tools section allows you to export your WP Rocket configuration to a JSON file and import it into a new plugin installation.
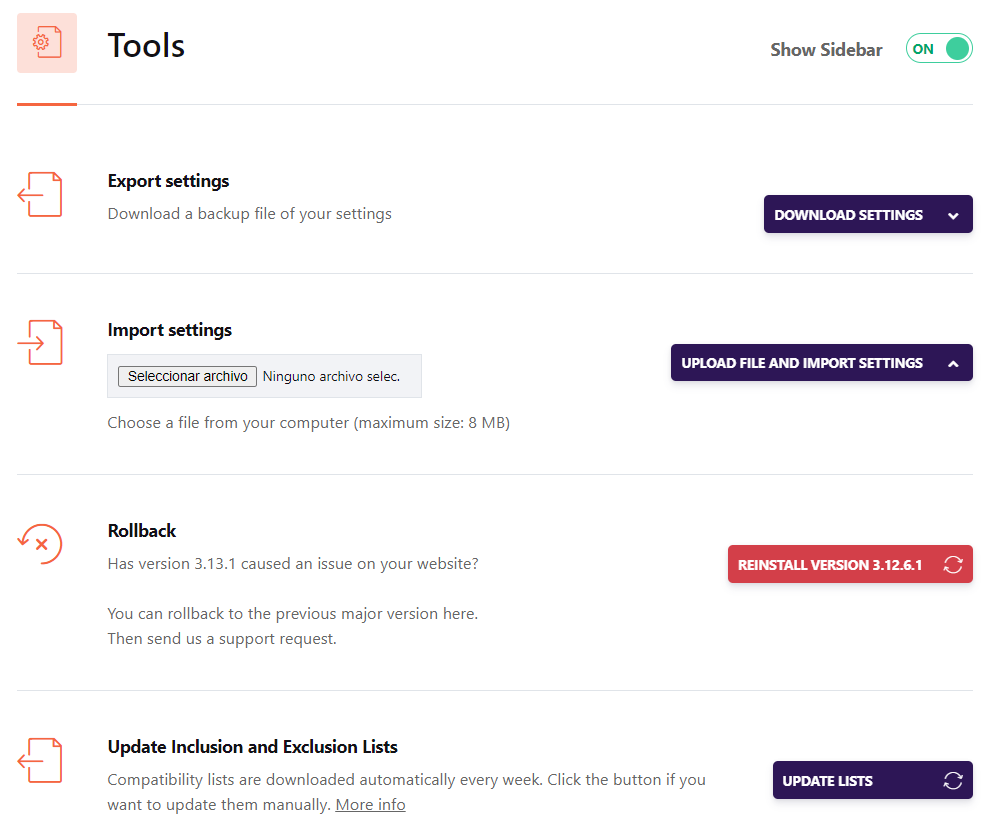
From this section, you can also manually update the inclusion and exclusion lists.
These lists are continuously updated on WP Rocket servers to ensure the proper functioning of the plugin and are automatically downloaded every week.
If, for some reason, the download hasn’t occurred on your WordPress, or if you notice any issues with WP Rocket’s functioning, you can manually download the latest version of the file from this section.
Finally, the Tools tab allows you to revert to a previous version of the plugin if you discover any problems with your website after updating to the new version of WP Rocket.
Is WP Rocket Worth Buying? Final Thoughts
Throughout this walkthrough of WP Rocket’s features, you’ve seen that it offers much more than just caching solutions, making your website lighter and more responsive to user requests.
Some users argue that there are free plugins out there that can perform almost all the tasks WP Rocket does, questioning the need to invest in it.
However, one of the standout benefits of WP Rocket is its comprehensive suite of features. This means you won’t need to clutter your site with multiple plugins, which, as you may know, can hinder performance and stability.
Plus, the straightforward configuration of WP Rocket’s features is a stark contrast to the more complex setups required by some free plugins.
Consider the time it might take to configure five separate plugins, for example, versus what you can accomplish with just a few clicks in WP Rocket.
So, if you’re in the market for a full-fledged caching plugin for your site, I’d recommend giving WP Rocket a shot. You’re bound to notice the difference.
