

One thing I always do with my WordPress setups: install an SEO plugin.
In that regard, Yoast SEO is a no-brainer.
While Rank Math is a strong contender, I genuinely believe Yoast stands as one of the top WordPress SEO plugins out there.

Today, I’m going to walk you through how to set it up thoroughly, ensuring you leave no stone unturned and make Google’s job easy when it crawls your site.
If this is your first time installing this plugin, I think this guide is gonna be a game-changer for you. And if you’ve used it before, you might just pick up a tip or two you hadn’t come across before.
So, let’s dive right in!
What is Yoast SEO and Why Do You Need It?
Yoast SEO is a WordPress plugin designed to give search engines a clearer understanding of your website, thereby boosting your online visibility.
You probably recognize the significance of managing your page indexing correctly, crafting engaging meta titles and descriptions, or having a well-structured XML sitemap.
Well, with Yoast, you can take the reins on all of these and so much more.
So, if you’re eager to learn what this SEO powerhouse can offer and how to set it up seamlessly on WordPress, keep reading for the inside scoop.
Setting Up the Yoast SEO Plugin from Scratch: A Step-by-Step Guide
Yoast SEO isn’t tough to get a handle on, but it does pack a ton of features designed to enhance the search ranking of your posts or pages. That can feel a bit overwhelming, especially if it’s your first rodeo with the plugin.
If you’re aiming to fine-tune Yoast SEO on WordPress and make sure Google reads every nook and cranny of your site just right, this guide is bound to be a game-changer for you.
I’ll walk you through, step by step, the essential aspects I consider when leveraging this SEO plugin to its fullest.
Let’s dive in!
Installing the Yoast SEO Plugin on WordPress
The Yoast SEO plugin (or SEO by Yoast, as it was called back in the day) installs just like most WordPress add-ons.
Simply head over to the ‘Plugins’ section and click on ‘Add New’.
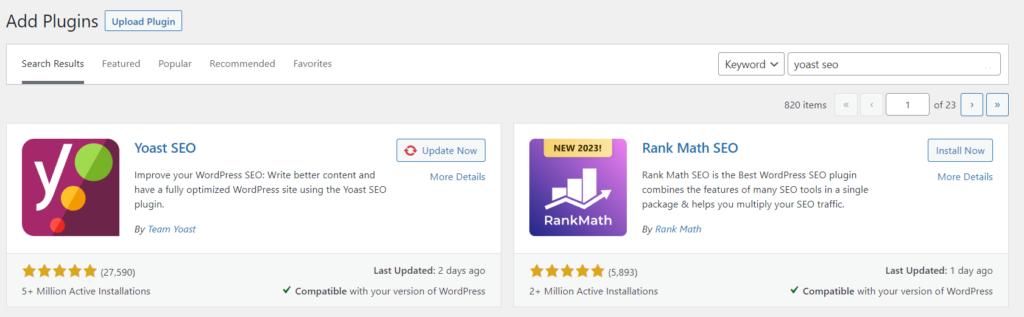
In the search box, type in “Yoast SEO”. It’ll likely pop up as the top result (it’s the one developed by Team Yoast, boasting over 5 million installations).
Click on “Install Now”, and then hit “Activate”.
There you go! Just like that.
You’ve now installed the Yoast SEO plugin on your WordPress.
Initial Setup with the Yoast SEO Wizard
To simplify its initial setup, Yoast SEO comes with a wizard that you can run right after installation.
To start, just click on the button that appears on the screen following the plugin’s activation, and it’ll take you straight to the initial configuration tab.
The wizard consists of a sequence of 5 steps through which you’ll set up the plugin’s basic information.
Let’s dive in.
Step 1: SEO Data Optimization
In this initial phase, Yoast SEO scans your entire website, mimicking Google’s bot, and extracts the main metadata from your pages to store them in a separate database.
This is referred to as indexables. Their goal is to present your website’s information to search engines in a much quicker and efficient manner, thus enhancing the indexing of your pages.
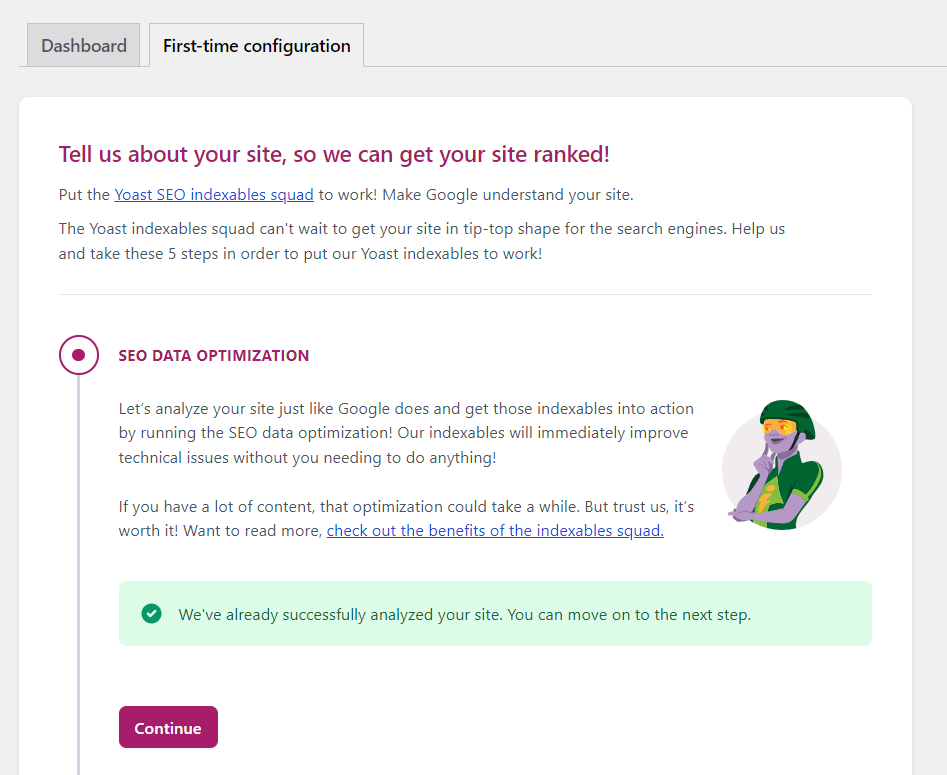
To set up this step, just click on the “Start SEO Data Optimization” button and let Yoast do its magic. Keep in mind, if your website is vast, the process might take several minutes.
Once it’s done, click “Continue” to proceed with the site setup.
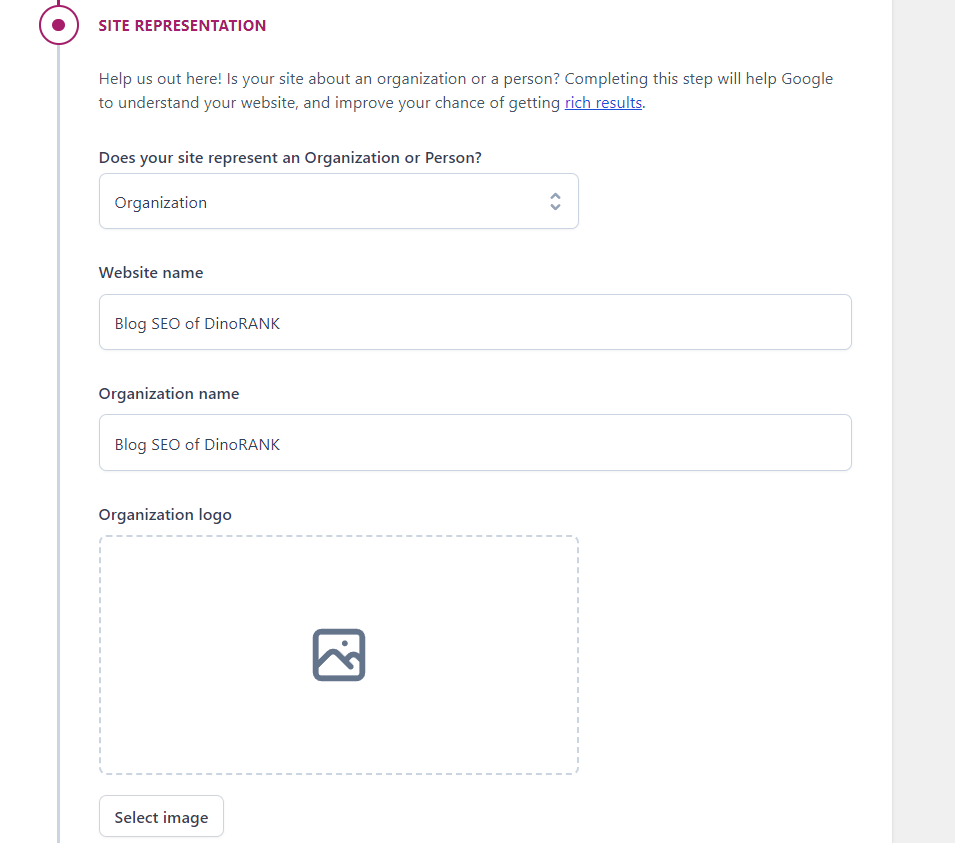
Step 2: Site Representation
Here, you need to fill out your website’s information. Specify whether the author is an individual or an organization, provide their name, and choose the appropriate logo.
Step 3: Social Media Profiles
Now, it’s time for the social media profiles.
If you’ve indicated that the site’s owner is an organization, you can input the social media handles associated with that company here.
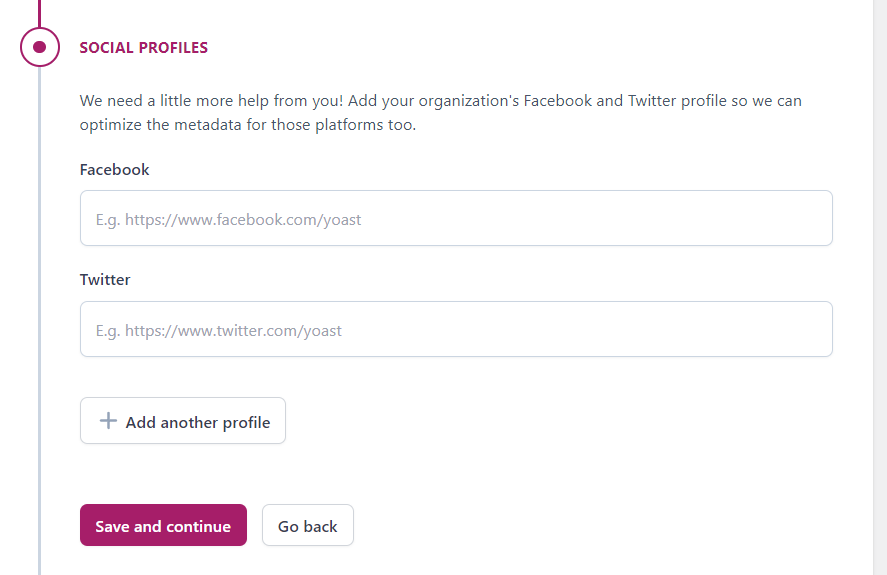
If you specified that the website’s author is an individual, you’ll need to fill out the social media profiles in the settings for the respective user account.
Step 4: Personal Preferences
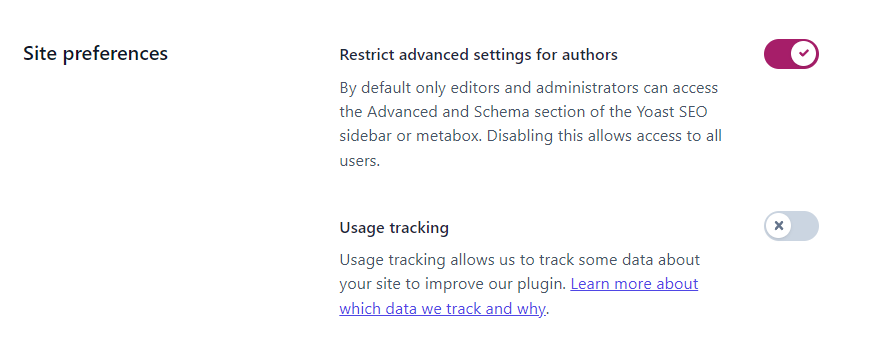
In the next screen, you can choose whether to send usage data to Yoast servers to help enhance the plugin, as well as subscribe to their newsletter.
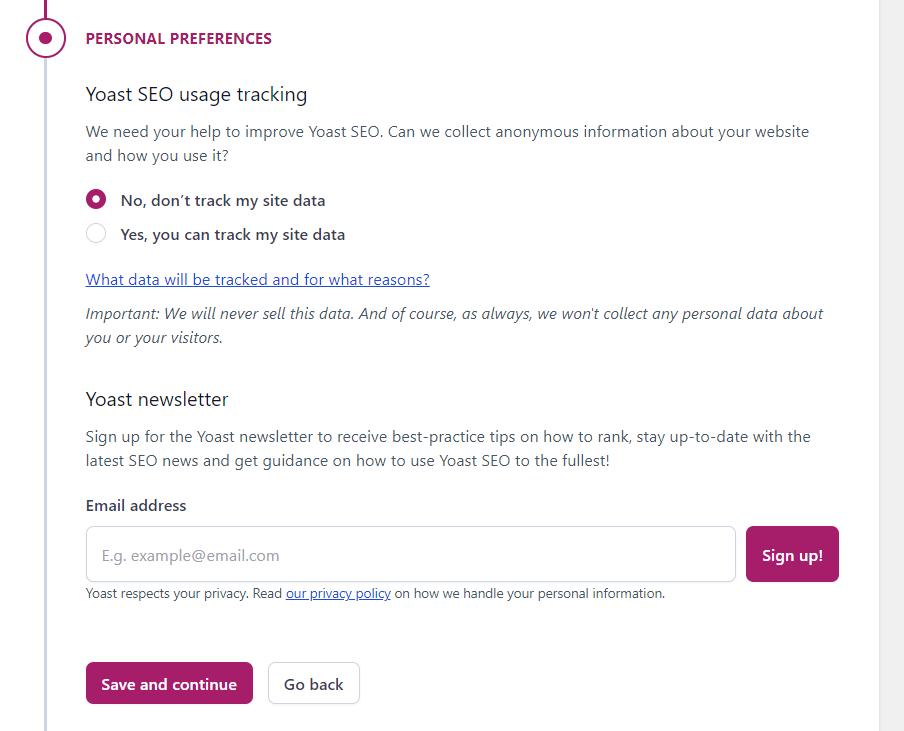
I personally don’t do either, but if you’re just starting out with SEO, it might be a good idea to subscribe to Yoast’s newsletter for a while. This way, you can get helpful tips straight to your inbox that’ll teach you the essentials of search engine optimization.
Step 5: Wrap up the Setup
This final step is just for your information.
Yoast now has the basic info it needs to manage your website.
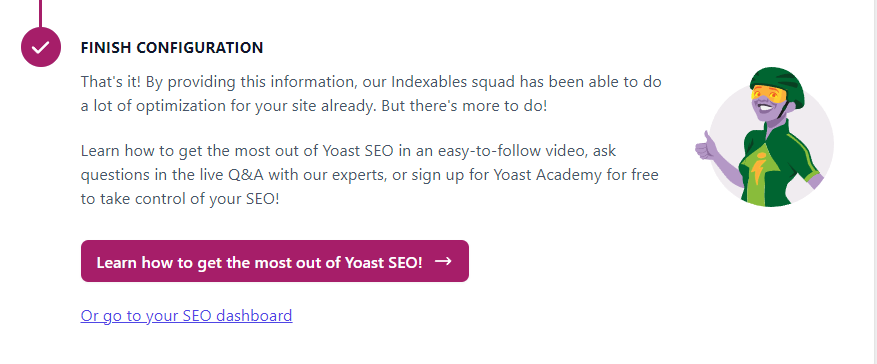
But the plugin setup doesn’t end here. We still need to fine-tune how we want search engines to interact with our pages.
So, let’s dive into the most crucial part of Yoast: the settings.
General Site Settings
Right when you enter the Yoast SEO Settings section, you’re presented with a screen to activate the plugin modules you want to use.
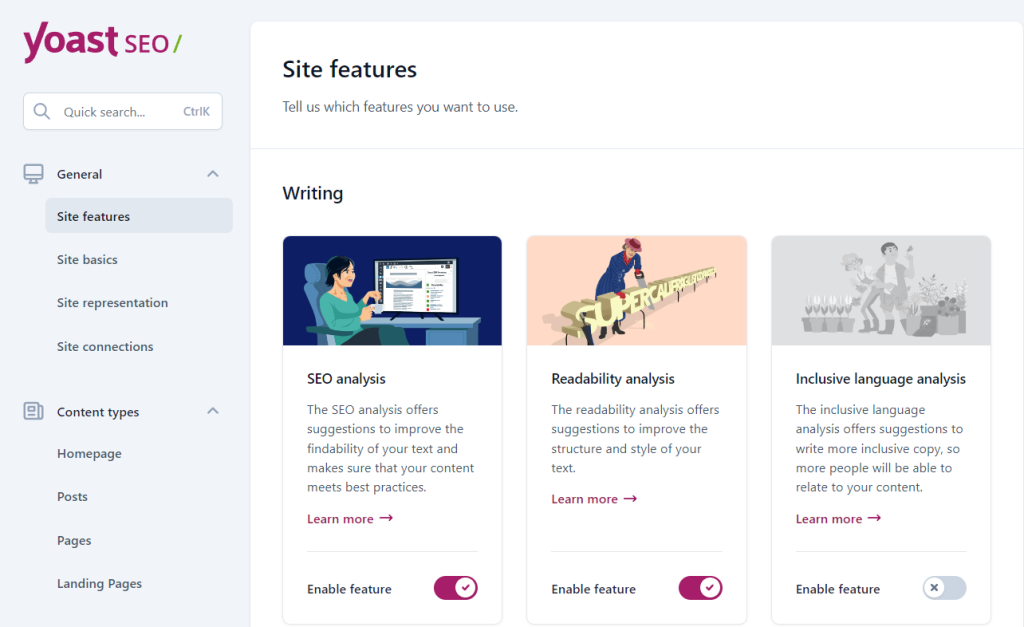
As you’ll see, there are features that can significantly boost your website’s SEO, both in content writing and more technical tasks.
You can pick and choose whichever you find beneficial, but these are the ones I typically enable on all my websites:
- Open Graph Data: To embed special metadata for social networks on my site.
- Twitter Card Data: To enhance visibility on Twitter.
- REST API Head Endpoint: So Yoast takes care of ensuring my URLs correctly display all SEO metadata.
- XML Sitemaps: Essential for generating the Sitemap file.
Under the tabs “Site Basics” and “Site Representation” within general settings, you’ll find the website identification details you set up via the wizard, and you can adjust them if needed.
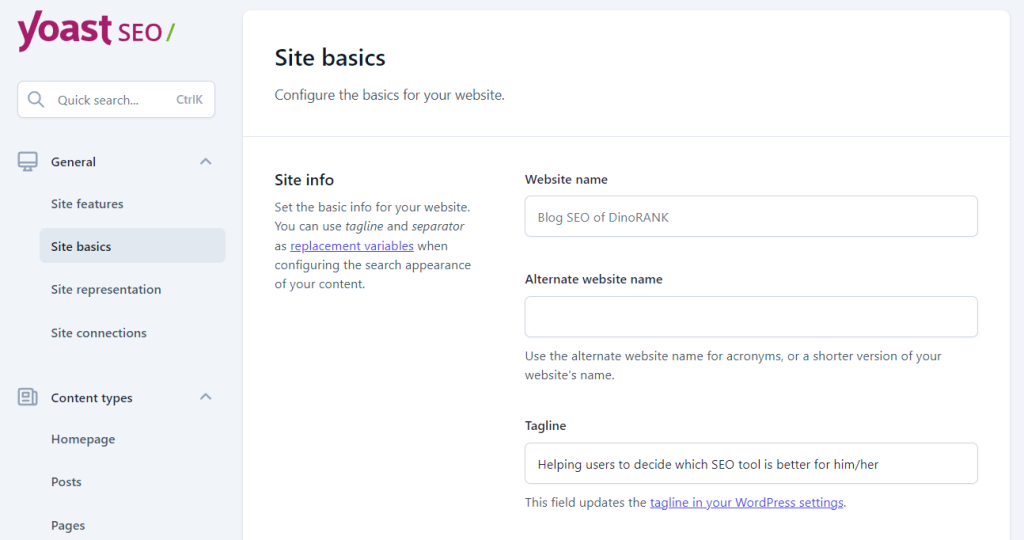
Crucially, in the “Site Basics” section, make sure to check the option “Restrict advanced settings to authors” if you want only site administrators and editors to have the capability to alter specific Yoast settings.
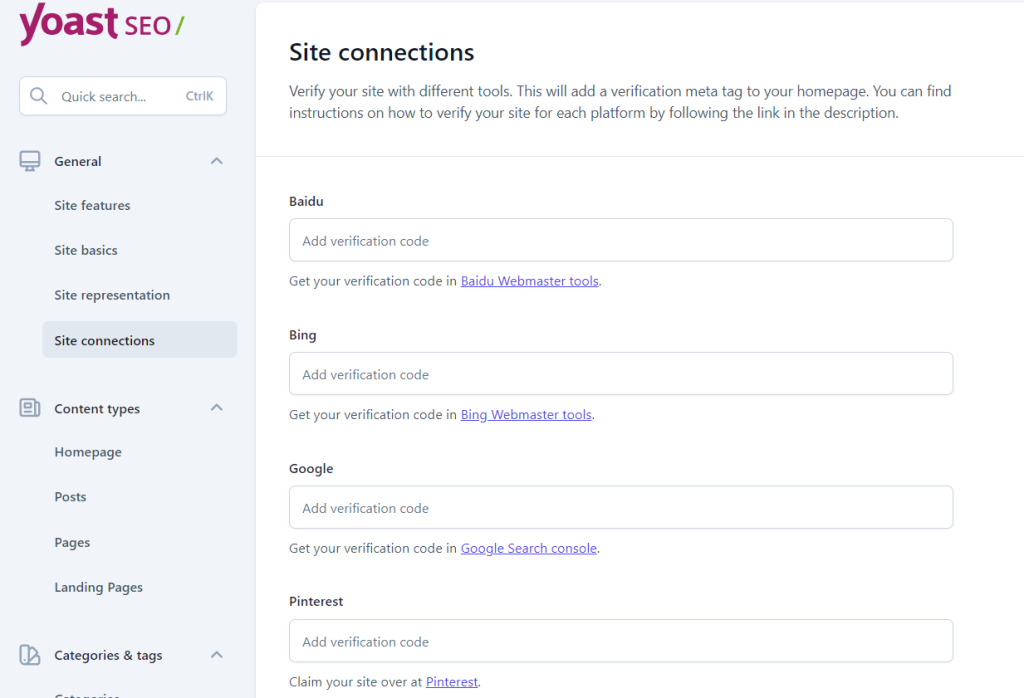
Lastly, under the “Site Connections” tab, you can input verification codes that allow you to register your website with Google Search Console or webmaster tools from other search engines like Bing, Yandex, or Baidu.
Meta Titles and Meta Descriptions with the Yoast SEO Plugin
Within Yoast SEO settings, you’ll find configuration options for the visibility of different content types.
This is the most critical part of the plugin, allowing us to control how our URLs’ meta tags will be displayed and whether they should be indexed.
We’ll see options for configuring the homepage, pages, posts, and taxonomies (categories and tags).
Each of these content types is customized through its own panel, letting us set the default behavior.
For setting up the homepage, Yoast directs us to edit that page and adjust its attributes via the SEO attributes box. Later, we’ll discuss how to do this for any page or post.
For the other content types, the panel offers the following options:
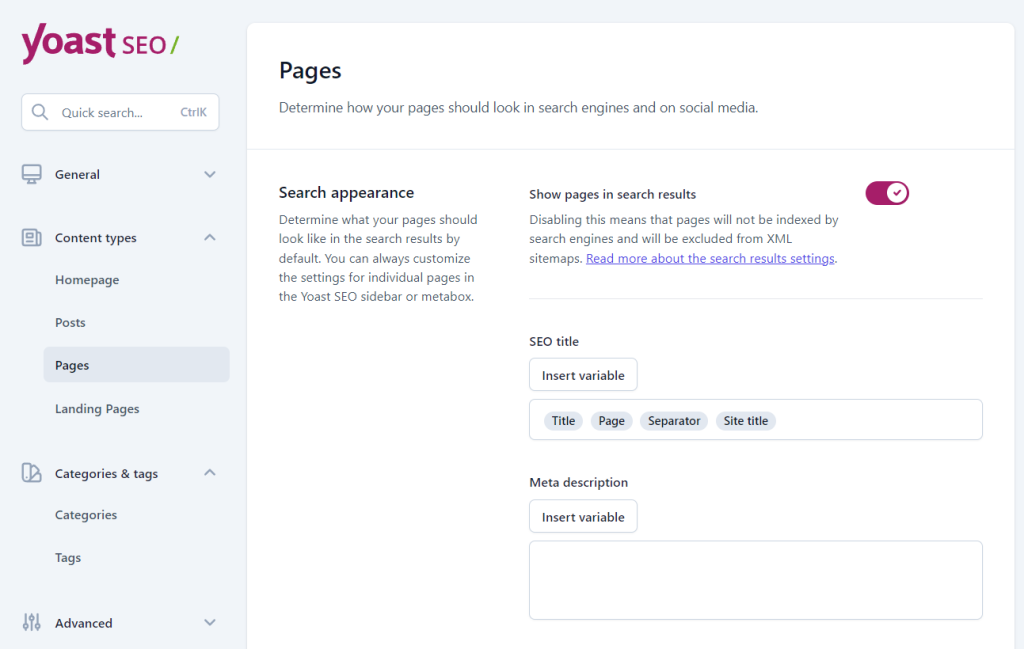
- Show in search results: Turning off this option will ensure that the specific content type in question (pages, posts, or taxonomies) doesn’t appear in the Sitemap and defaults to ‘noindex’. I typically leave this enabled for pages and posts and disable it for taxonomies, but this can vary greatly depending on the specific project.
- SEO Title: This lets us set the default meta title for each content type on our website. We can use variables to fill this out, such as the post or page title, publication date, or site name.
- Meta description: Just as we can configure titles, we also have the ability to customize the default structure for meta descriptions here.
- Social Appearance: If we have the Premium version of Yoast SEO, this section lets us define our content’s settings for social networks.
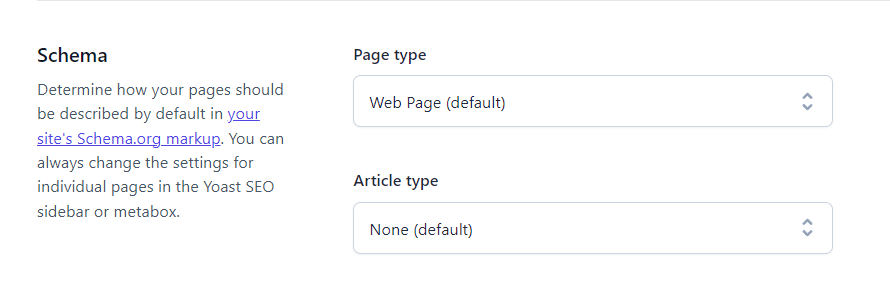
- Schema: Schema markup is crucial for ensuring search engines correctly understand your website. With this option, we can broadly specify our URLs’ content type.
- Enable SEO controls and assessments: This allows Yoast to display its SEO box on each individual page, post, or taxonomy. I always turn this on.
In addition to everything mentioned, the category settings section includes the option “Show category prefix in the slug.” This allows you to decide if you want the category URLs to be preceded by the /category/ prefix or not.
Lastly, it’s worth noting that, even though I always set a general structure for titles, descriptions, and Schema markup, I subsequently configure all these details individually for each content type using the SEO box.
I believe it’s the most suitable approach if we aim to provide Google and other search engines with accurate information about every URL on our website.
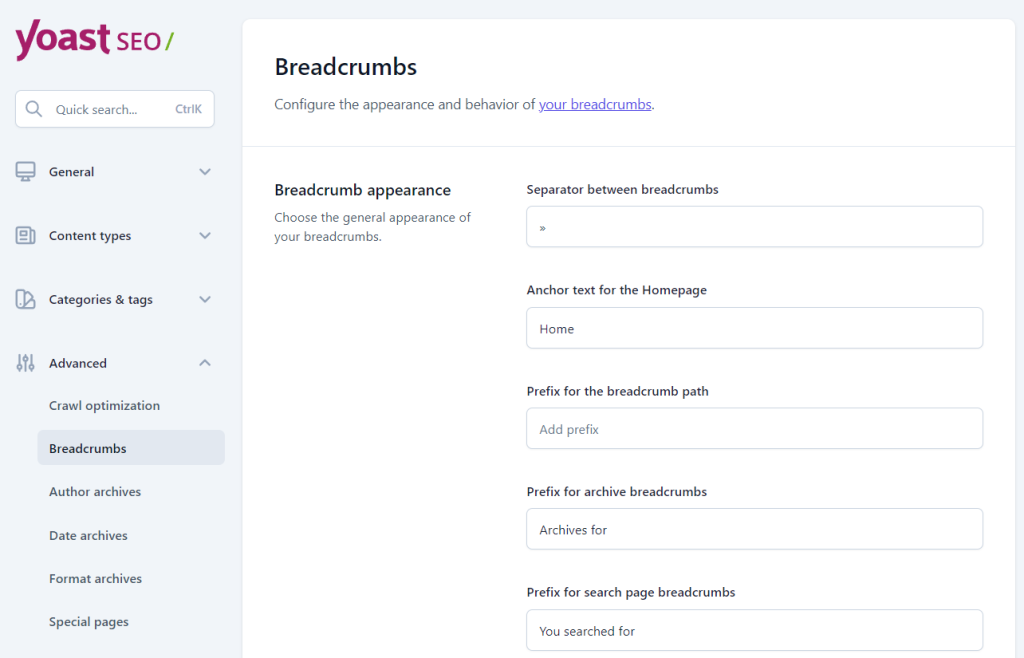
Breadcrumbs on Your Website Thanks to Yoast SEO for WordPress
Breadcrumbs are extremely useful for users as they aid in website navigation, allowing them to see where they are at any given moment.
Yoast SEO offers a feature to add breadcrumbs to your site via a section within the Advanced Settings.
Here, you can customize their appearance and specify on which types of content they should be displayed.
Using Breadcrumbs with Yoast SEO To use these breadcrumbs, you can employ a shortcode which you’ll need to place manually on every page or post where you want to display them. Alternatively, you can activate them in your theme by adding a snippet of code to the PHP files.
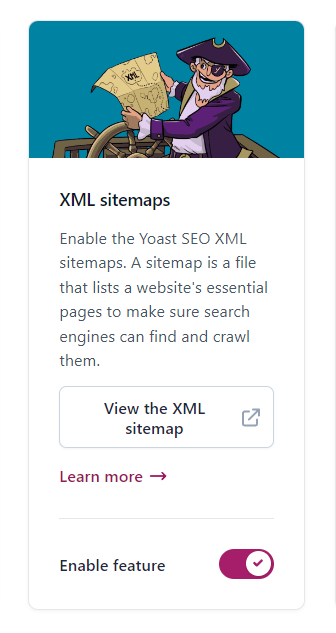
Yoast SEO and the XML Sitemap
The sitemap is an essential tool in SEO, as it signals to search engines a complete list of URLs they should crawl when accessing our website.
With Yoast, creating and configuring this sitemap file couldn’t be easier.
All you need to do is activate the corresponding module, as I mentioned in the section where I discussed the site’s general settings.
After enabling this feature, you’ll have your sitemap in XML format accessible through a URL with the following structure: https://yourdomain/sitemap_index.xml
And, as I’ve also mentioned before, if you want to exclude a certain type of content from this sitemap, it’s as simple as unchecking the “Show in search results” box within the settings of that specific content type.
Advanced Features
The Yoast settings section has a subsection for advanced configurations.
Earlier, I mentioned one of these advanced options related to breadcrumbs, but there are several other aspects you can customize. I’ll briefly go over them:
- Crawl Options. This allows you to optimize the crawling that search engine bots do on your website by restricting the elements they should crawl. If you’re not sure about any of these options, it’s best not to tamper with them. I usually leave them as they are by default.
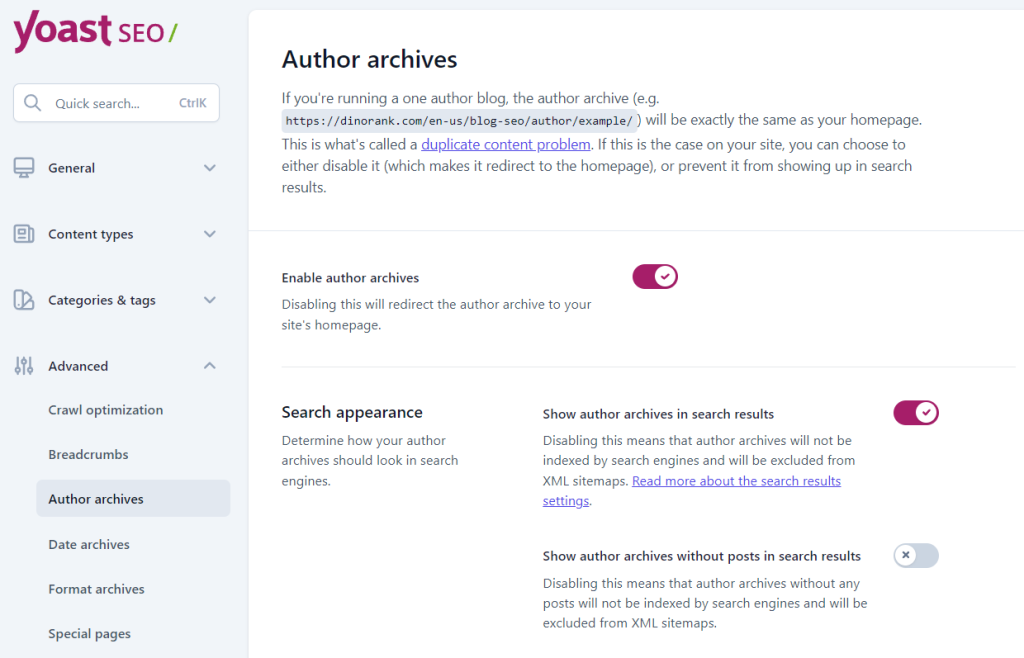
- Author, Date, Format, and Media Archives. These are pages that WordPress itself creates to organize its content and often lead to duplicate content or low-quality content (thin content). Except in very specific cases, I usually deactivate them.
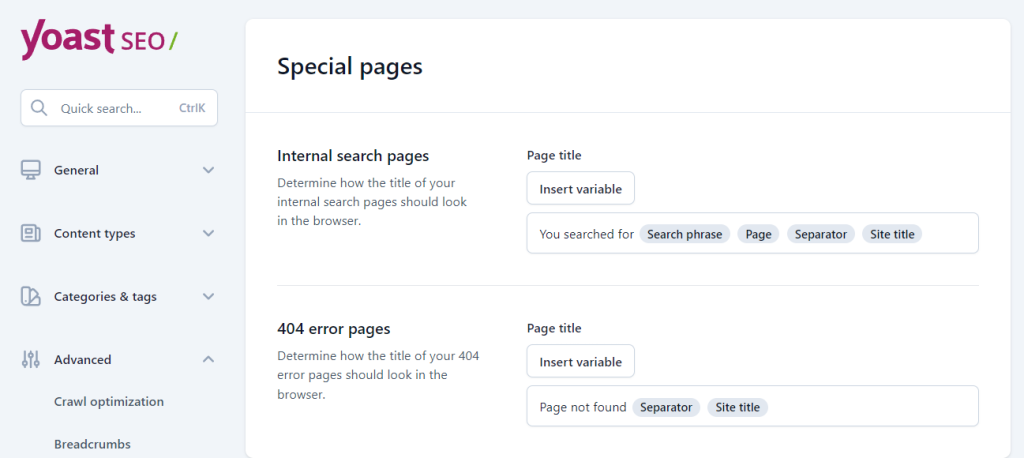
- Special Pages. Here you can configure the titles of pages that are displayed with the results of your WordPress internal searches or when a 404 error occurs.
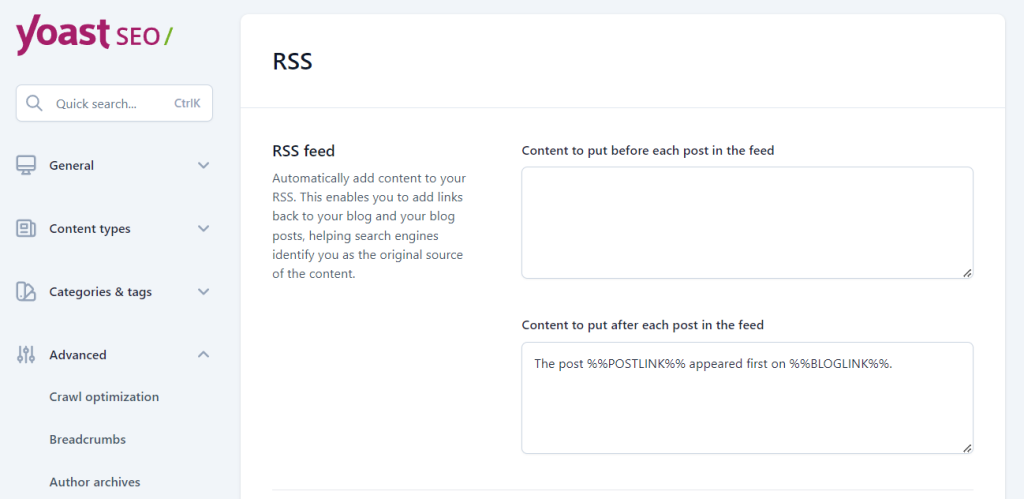
- RSS. On this screen, you can configure the texts that appear in the RSS entries of your website. This is useful for indicating that your website is the source of the content of these feeds that can be shared on the Internet and that some search engine might crawl.
Additional tools
In addition to all the settings we have seen, Yoast SEO has some additional tools that can be very useful for managing certain aspects of your website.
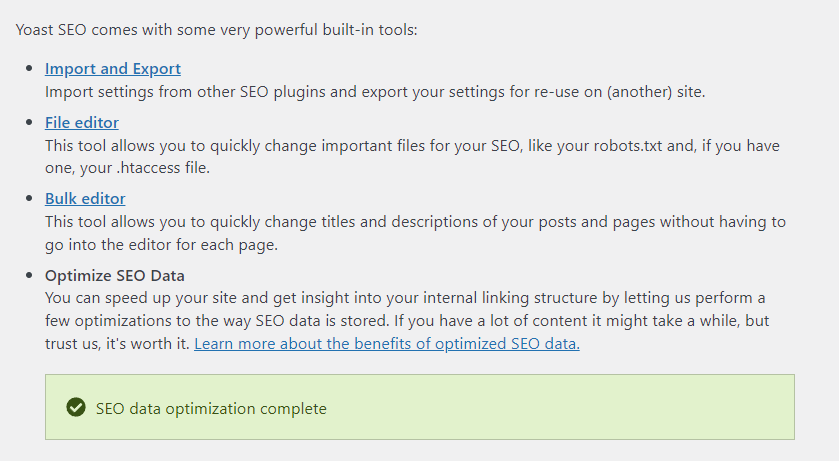
For example, you can export your Yoast settings to make a backup or import them into another website.
But that’s not all. Yoast also allows you to load the settings from other SEO plugins, such as Rank Math, to make the configuration task easier for you.
Another tool you have at your disposal is the file editor, which will allow you to modify your robots.txt or .htaccess files directly from your WordPress. However, I don’t recommend using this option if you’re not very sure about what you’re doing.
And the tool I like the most is the bulk editor.
You can quickly change the meta title or meta description tag for any URL without having to individually edit it. An option that undoubtedly saves you a lot of time.
Customizing an individual page or post through the Yoast SEO box
We have already seen how you can adjust Yoast SEO globally for your website.
However, while having a default general setting is good to save you some work, if we want Google to interpret each page of our website with the greatest precision, we have to configure each URL individually.
This is what the SEO box (or Meta Box) is for, which Yoast can include, if we activate it, at the bottom of the WordPress editor for each type of content.
Let’s see everything it allows us to do.
SEO Tab
The SEO tab in the Yoast box has many utilities, but without a doubt, the two most important are: the Google Preview and the Advanced Settings.
Through the preview, we can see how Google will display our page in the SERP (or, more precisely, how we want it to be displayed).
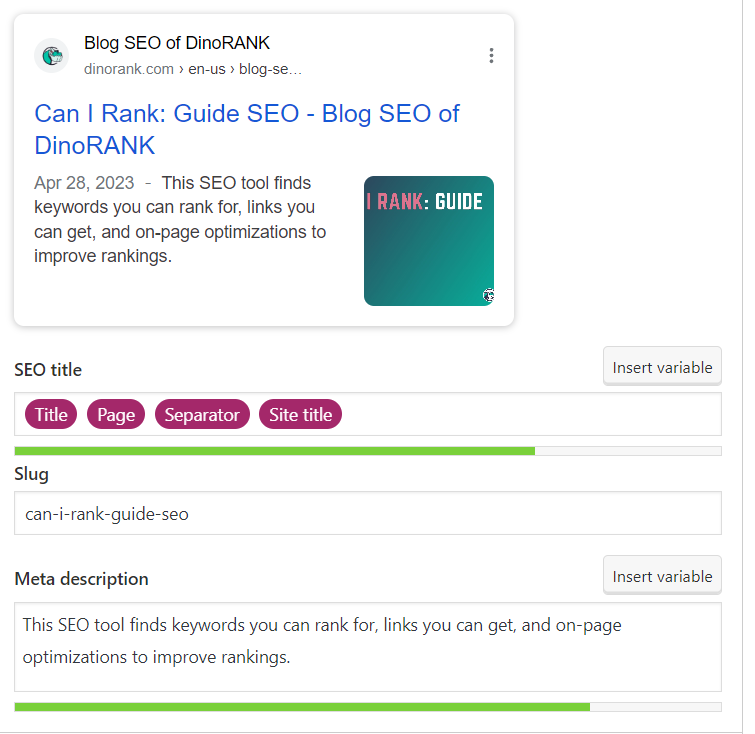
Here, you have the option to preview the result for desktop or mobile devices, as well as to modify the SEO title and description.
One thing to consider when editing these meta tags is that Google only takes into account a maximum number of characters. Specifically, 67 for the meta title and 155 for the meta description (though it’s recommended they be somewhat shorter).
Yoast SEO provides us with a color-coded bar (ranging from green to red) to indicate how optimized our tags are in terms of length.
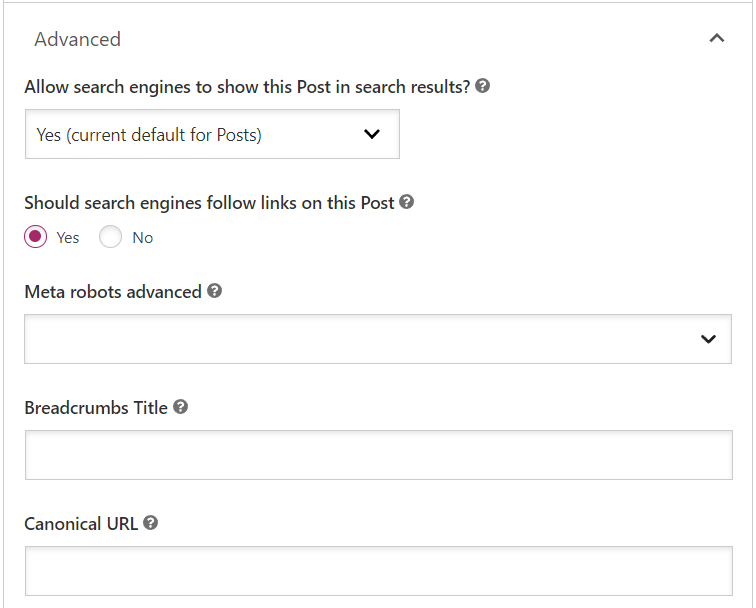
Regarding the advanced configuration, it allows us to specify whether the page should be displayed or not by search engines (index/noindex tag) and whether or not they should follow its links (follow/nofollow).
Lastly, the SEO tab has other utilities through which Yoast evaluates our page from an SEO perspective.
At this point, I must admit that I never pay too much attention to it. I prefer to follow my common sense and not introduce elements into the content in a forced manner that would make them lose their naturalness.
Readability Tab
Through this tab, Yoast SEO conducts a readability analysis and provides us with certain suggestions that, in theory, should improve our texts.
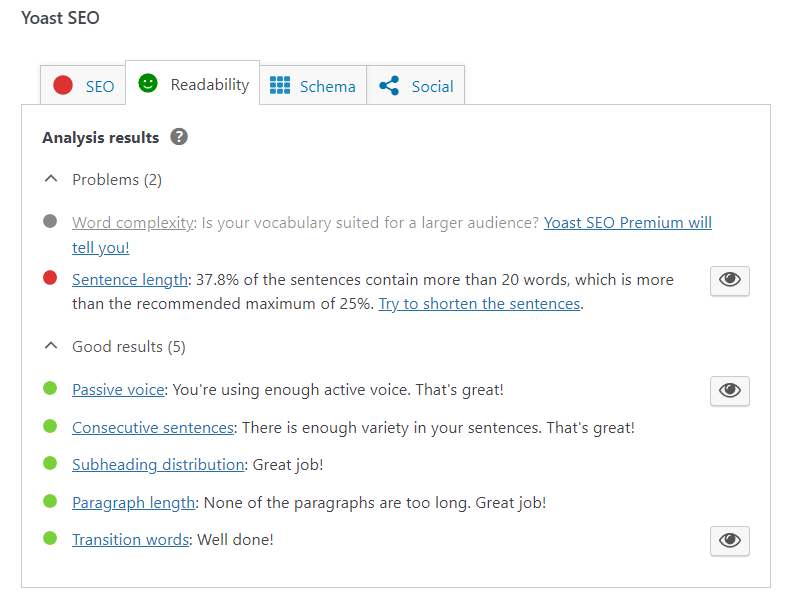
Sometimes, it can give you some improvement ideas, but just like with the SEO analysis, it’s not something I usually consider heavily.
I trust my instinct and experience more when it comes to creating content than what a machine tells me.
Schema Tab
In this section, we can modify the Schema markup of our page or post.
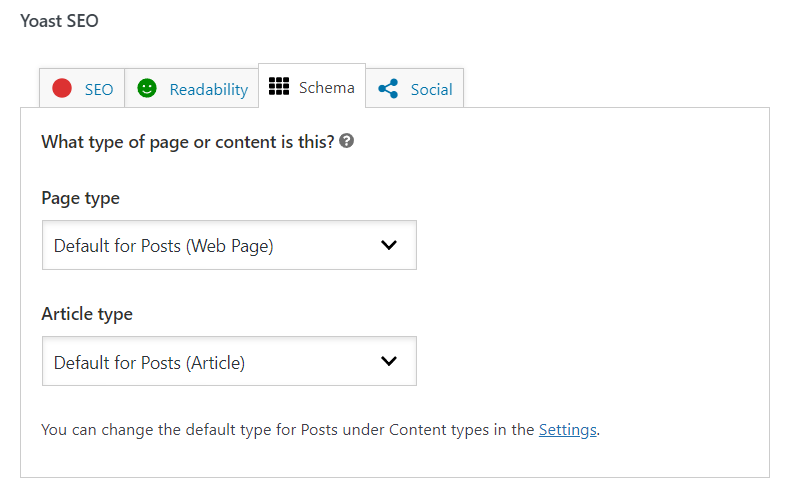
Simply select the page type and article type (if it really is an article) from the dropdown menus to inform search engines about the kind of content they can expect from the given URL.
Social Tab
The last tab in Yoast’s SEO box allows us to adjust how our page will appear when shared on social media, specifically on Facebook and Twitter.
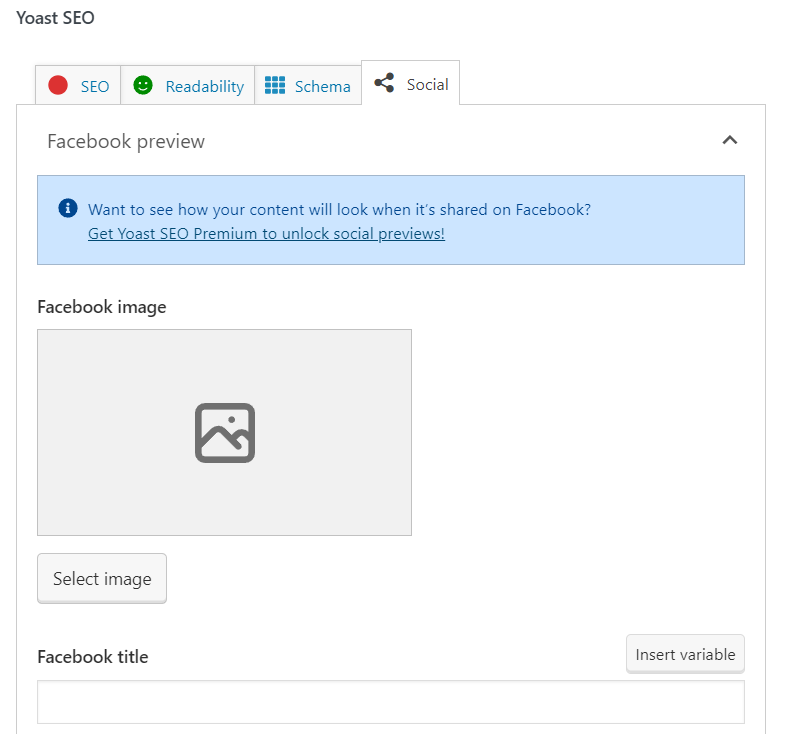
You can configure the image as well as the metadata for the title and description.
How much does the Yoast SEO Premium plugin cost and what are its advantages?
Yoast SEO has a free and a paid version.
The free version is the one that is installed directly from the WordPress plugin repository, while the Pro version of Yoast must be purchased on their website for €99 per year.
In my opinion, the free version is more than enough for most users, especially for those who are just starting out and cannot afford to invest in too many tools.
Does that mean Yoast SEO Premium is not worth it?
Not at all. The Premium version includes several features that can help you further optimize certain aspects of your website’s SEO, in addition to preventing you from having to install additional plugins.
Most important benefits of Yoast SEO Premium:
- Recommendations for internal linking.
- Automatic redirects to avoid broken links.
- Greater control over structured data.
- Preview results for social networks.
- 24/7 support.
- Full access to the Yoast SEO Academy.
In conclusion, Yoast SEO Premium offers very interesting advantages, but as always, the benefits you’ll get from it will depend on your knowledge and also your budget.
Final thoughts
In this post, I have tried to show you how to fine-tune the Yoast SEO plugin step by step, so that it’s easy for you to get it working correctly on your website.
I hope I have achieved that.
In any case, to make it even easier, I leave you with a short checklist on the main aspects you should review when setting up the Yoast SEO plugin.
Don’t forget to do this when setting up Yoast SEO for WordPress:
- Complete all the steps of the initial configuration assistant.
- Activate the social media and site map modules.
- Remove content types that you don’t want to appear in the sitemaps by deactivating the “Show in search results” option.
- Set a default Yoast SEO configuration for meta tags.
- Activate the SEO box in all content types you want to index.
- Always check the SEO box of each page or post before publishing it.
Thanks to Yoast SEO, your website will be ready for the search engine bots to come visit.
However, Yoast SEO alone doesn’t work magic.
If your content is not good, I highly doubt that you can reach high positions in Google’s search results.
But if you publish quality information and follow the steps in this guide, you can rest assured that Google and other search engines will understand your site correctly, and that will be a great help in improving your website’s ranking.
